Cooking
Cooking Related Posts
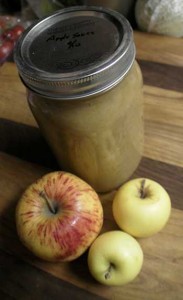
Applesauce – Best in it’s simplicity
0 Its apple picking season and apple prices are probably the lowest they are going to get for the local varieties. Apple sauce is another of those recipes you see and think “Is that all?”
(Just a note, this recipe is sparse on detailed measurements because the amount of apple you start with, the moisture content, etc, will effect final volumes. Just for reference my latest batch yielded a little over 3 quarts of apple sauce from about 4 quarts of chopped apples.)
Start with sweet apples, almost any variety will do. We picked a mixture of Golden Delicious, Fuji, and Braeburn. Since these apples were a bit on the small side and not super-sweet I added a couple Jonagolds to sweeten it up.
Core and slice the apples into rough chunks. Don’t worry about peeling, once the apples are softened the blender will easily puree the skins.
In a pot large enough to contain the apples, add just enough water to cover the bottom. Basically we are going to steam the apples to cook and soften them. Cover and simmer until the apples are soft. About 30-45 minutes. Alternatively, you can put the apples in a large microwave safe bowl, cover with plastic wrap and nuke for 3-6 minutes until the apples are soft.
I prefer to use a stick blender to puree the apples, but you can also use a food processor, blender, potato masher or fork if you have none of the above. Blend or mash until its the consistency you like.
Add a dash of cinnamon if you desire, and that’s all it takes to have some fresh and tasty apple sauce. Yup, it really is that simple.
Recipe: Applesauce
- Apples, sweet varieties
- ~1/2 cup water
- Core and slice apples
- Cook apples to soften (using one of the following techniques)
- Microwave in a dish covered with plastic wrap until soft 3-6min, omit water
- In a large pot, add enough water to cover bottom and cook apples covered until they are soft
- Blend or puree until smooth
Now at this point I take it a step further. Since the apples are fresh now, I have taken this opportunity to “stock up” on some applesauce with plans for Latkes come Chanukah time.
Applesauce can be canned easily using the water bath canning method. Just follow this link for instructions, and the time table for how long you need to boil the jars for your elevation.
The Basic Breakdown:
In my book, no store bought applesauce beats fresh or homemade. But lets look at the costs of store bought. Around here we are looking at a price of roughly $2/lb of store bought applesauce (when you buy it in the larger jars). Taking out a little for the “core weight”, I would estimate that home-made has “value” if you can buy apples for anything less than $1.85/lb or about 90% the cost of pre-made applesauce. But aside from that, you can control the flavor much more just by selecting your favorite varieties of apple.
Besides, have I mentioned home-made tastes better?
Miso Eggs
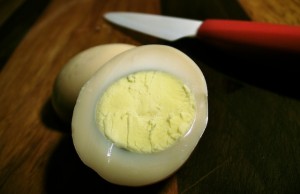
0 I first read about Miso Tamago on the Just Bento blog by Makiko Itoh. Miso, aside from making a delicious soup, is also traditionally used to pickle vegetables like daikon radish or eggplant. I am hesitant to say it, but in this case we are “pickling” hard-boiled eggs.
I hesitate because the image most Americans have when you mention “pickled eggs” is a jar that’s been sitting on a bartop for an indeterminate period of time, with a liquid of red or greenish hue, filled with the oblong orbs floating ominously in it.
The only relation this recipe has with that image, is an egg is involved. So check your prejudice at the door.
After learning this very simple recipe. Miso eggs have become a staple in our house. Be it for a quick snack, breakfast in a hurry, or some protein added to a lunch, these eggs are a delicious commodity.
My version of this recipe is a little different than that of Makiko. Since I am storing all of the eggs together, rather than individually wrapped, I have increased the liquid element. Also, since we have some great local mesquite honey, I am using honey rather than maple syrup, but feel free to try either and see how each suits your tastes.
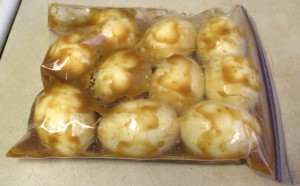
 A quart mason jar large enough to store about 10 miso eggs in the fridge, but actually I found that the best way to ensure an even coating and flavor profile was to use a 1-quart zip-top bag. Every day I would move the bag to make sure no surface sat uncoated. Some water will be drawn out of the eggs, increasing the liquid, which helps keeping everything coated. This brings more flavor into the eggs, but keep in mind that as the salt draws moisture out, the egg is becoming “drier”, and at the end of a week you might find the yolks are a little dry.
Recipe: Miso Eggs
- 8-12 hard-boiled eggs (shelled)
- 3 Tbsp miso (I prefer Red Miso)
- 3 Tbsp honey
- Mix miso and honey together.
- Coat eggs with mixture, and store in the refrigerator.
- Wait 48 hrs if you can. I find that the flavor reaches the yolk around day 3, and the should keep for about 10 days.
The Basic Breakdown:
We get “cage-free” eggs at Costco, for about $3.60/18eggs, which is $0.20/egg. A 26oz container of miso, is about $4, which comes to about $0.23/recipe. We can get Mesquite honey here at $6.50 for 3 lbs, which comes to $0.20/recipe.
If we spread that cost of Miso and Honey across a full dozen eggs, we are looking at a cost per miso egg at $0.235. Less than a quarter per egg!
Calorie-wise, the average extra-large egg is 70 calories, the total calories in the miso is 35, and from the honey is 180. Keep in mind you are not drinking the liquid, and I typically rinse off the eggs before eating, so the calorie addition to the egg itself is minimal, which is why I estimate a single miso egg has about 75 calories.